Showing posts with label cooking. Show all posts

Tuesday, 16 August 2016

NUTELLA MUFFINS

As with all the recipes I post, this is not my own recipe, it's one I've adapted from another recipe. Today's post is one of my new favourites, and one I think I may even prefer to regular chocolate cake at the moment, Nutella muffins.

Makes 15

You Will Need:
175g butter
115g light soft brown sugar
2 eggs
2tbsp Nutella
175g self raising flour
Extra Nutella to spread on top

Instructions:
1. Preheat oven to 180 degrees Celsius.
2. Beat butter and sugar together, then beat in the eggs.
3. Stir in the Nutella, then fold in the flour.
4. Bake for 20 minutes,
5. Once cooled, you can spread Nutella on the top instead of icing.

Rosie
Hella delicious

Monday, 21 December 2015

GINGERBREAD STARS

So as it's Christmas, it's the time of year when the presence of gingerbread is rife. As I'd never made or had homemade gingerbread before, I thought I'd give it a go, just in time for Christmas. You could decorate these with icing, or poke holes in them before you cook to use as tress decorations, both of which would look cool, but I've decided to leave mine plain.

Makes: roughly 60 stars of varying sizes

You Will Need:
350g plain flour
1 teaspoon bicarbonate of soda
1 teaspoon ground cinnamon
2 teaspoons ground ginger
125g butter
175g light soft brown sugar
1 egg
4 tablespoons golden syrup

How to Make:
1. Mix the flour, bicarbonate of soda, cinnamon and ginger together in a food processor.
2. Add the butter and mix again.
3. Add the sugar and stir (don't process).
4. Beat the egg and golden syrup together in a bowl.
5. Add to the food processor and pulse until the mixture clumps together. (Pulsing means to process together in short periods repeatedly, rather than all at once).
6. Knead the dough together and wrap in clingfilm.
7. Leave to chill in the fridge for around 20 minutes.
8. Preheat the oven to 180 degrees Celsius.
9. Line baking sheets with greaseproof paper.
10. Roll out the dough to around half a cm thick. If the dough is too sticky when rolling it out (like mine was) just knead in a load of flour and it should be okay. You will also need to put flour on the surface and on the rolling pin, so that it doesn't stick to either of them.
11. Cut out your shapes; I decided to make stars and I thought it would be more interesting if I used a variety of sizes, instead of just one cutter.
12. Bake for 12-15 minutes and leave to cool. (I did my first batch for 15 and they were a little crispy so I did them for less time with the second batch, which worked out better).

Rosie

Sunday, 28 June 2015

SUPPOSEDLY RED VELVET CUPCAKES

Disclaimer: this is not my own personal recipe, this is an adaption of a couple of different recipes from cook books and the internet. I have predominantly used Nigella Lawson's 'Kitchen' book, though I have made some moderation's to the quantity of some ingredients, chiefly I have used less food colouring and less vanilla extract. 

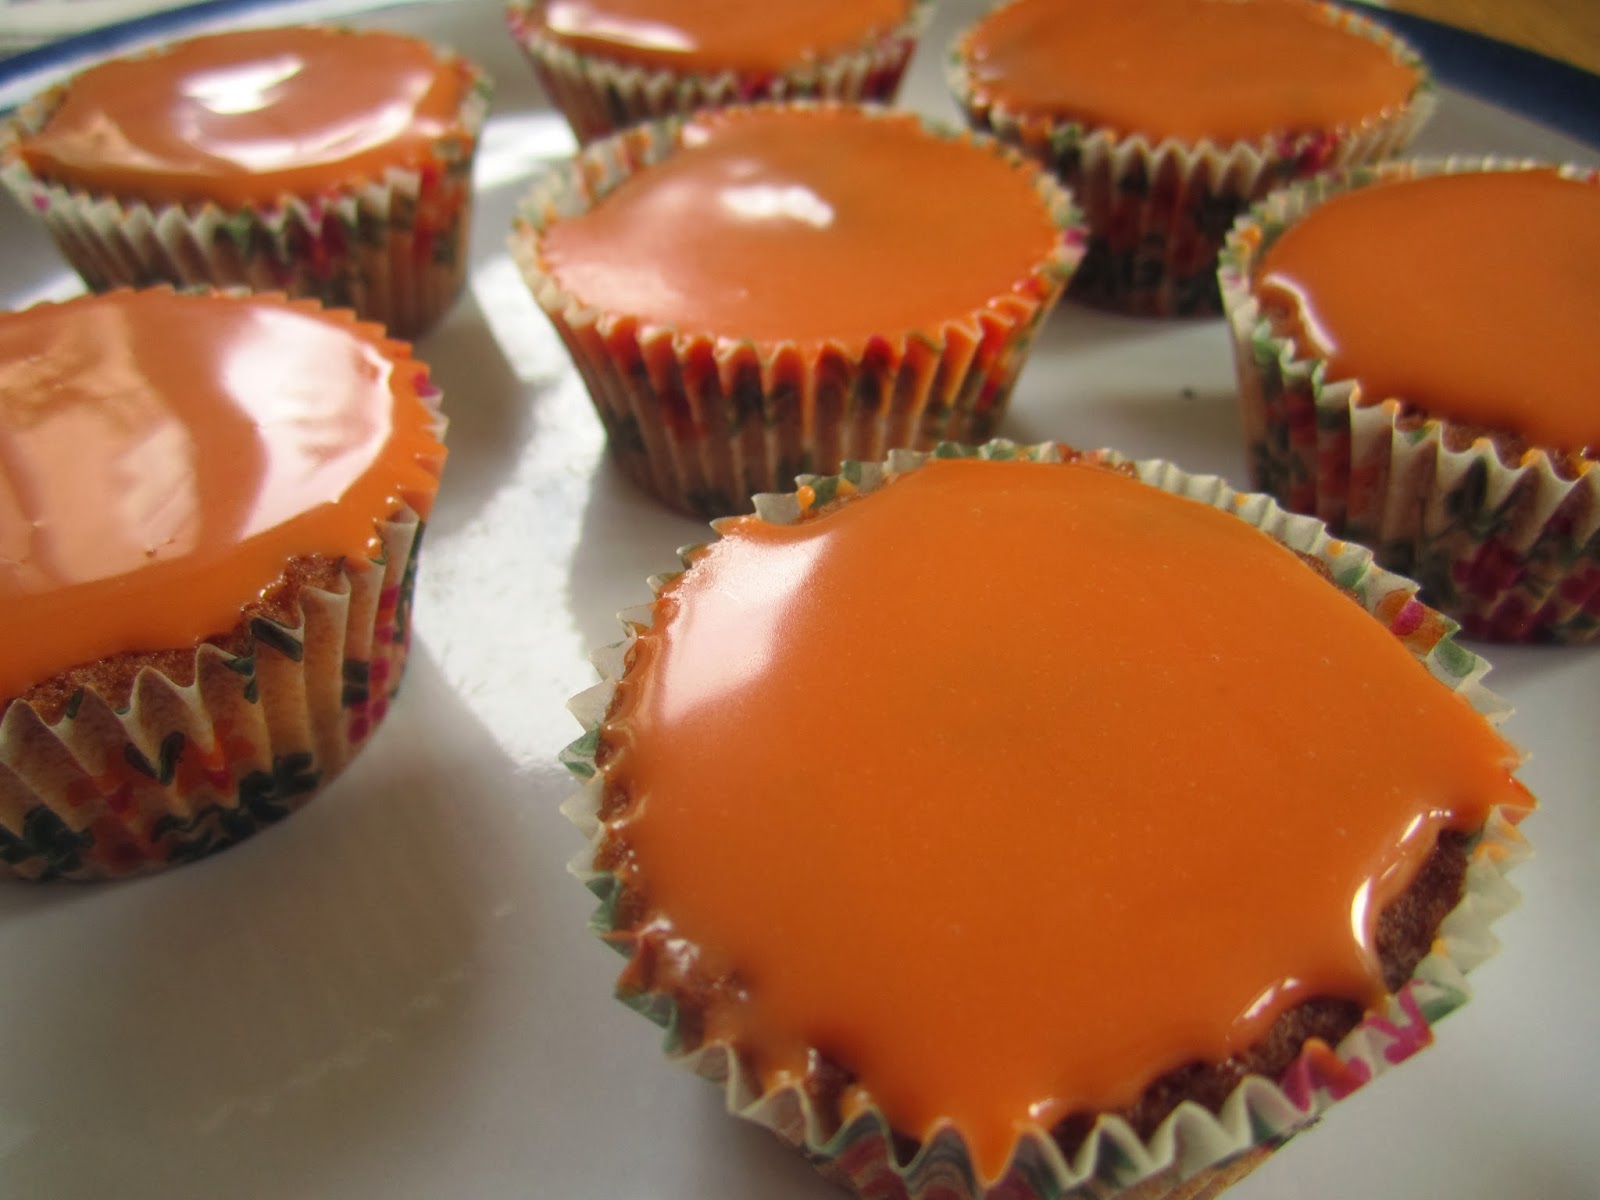
These were supposed to be red velvet cakes, but they've turned out orange for reasons that cannot be explained. They still taste great though. The recipe states that it makes 24 cupcakes, though I have managed to make 12 massive (overfilled) muffins and 15 cupcakes. 

Red velvet is one of my all-time favourite cakes, so I decided to make some. Simple as. I am not going to decorate them this time, though if I was I would use either cream cheese, sour cream or buttercream icing, and I would decorate them with those little silver balls.

You Will Need:
(-Cupcake cases (I'm using muffin cases and cupcake cases))
(-2 mixing bowls)
-250g plain flour
-2 tablespoons cocoa powder
-2 teaspoons baking powder
-Half teaspoon bicarbonate of soda
-100g unsalted butter
-200g caster sugar
-1.5 teaspoon red food colouring (add more for a more intense colour)
-1.5 teaspoon vanilla extract
-2 eggs
-175ml buttermilk (see below)
-1 teaspoon cider vinegar (or another type of vinegar- I used white wine vinegar)

Buttermilk
All recipes for red velvet call for buttermilk, which is not something that normal people tend to have in their houses. Buttermilk can be made by mixing a tablespoon of white wine vinegar or a tablespoon of lemon juice with milk and leaving for a few minutes. I have done this here, using a glass of semi-skimmed milk mixed with a tablespoon of white wine vinegar.

To Make:
-Preheat the over to 170 degrees Celsius.
-Sift the flour, cocoa powder, baking powder and bicarbonate of soda into the first bowl and mix together.
-In the second bowl, add the butter and sugar, cream and beat well.
-Beat the food colouring and vanilla extract into the butter and sugar mixture.
-Add some of the mixture from the first bowl into the second bowl, and beat.
-Add the first egg to the second bowl and beat.
-Add some more of the mixture from the first bowl into the second bowl and beat.
-Add the second egg to the second bowl and beat.
-Add the remaining mixture from the first bowl into the second bowl and beat.
-Add the buttermilk and vinegar and beat, don't be alarmed at how liquidy it is, it thickens up with stirring.
-Add the mixture to the cupcake cases, don't fill all the way to the top as they will rise.
-Cook for 20 minutes, or until done. To check that the cakes are done, stick a knife through one. If the knife comes out clean with no mixture on it, the cakes are cooked through.
-Leave to cool.

Tuesday, 23 December 2014

BLOGMAS DAY 23- MINCE PIES

Tuesday 23rd December 2014
2 sleeps till Christmas

Wouldn't be Christmas without mince pies (recipe credit to Delia Smith with a few alterations).

You Will Need (For Pastry):
-350g plain flour
-75g lard
-pinch of salt
-cold water for mixing

You Will Need (Everything Else):
-700g mincemeat
-Small amount of water and milk.
-round cutters (see below)
-cupcake tray

To Make (Shortcrust Pastry):
1. Sift the flour and salt.
2. Cut the fat into cubes and rub into the flour and salt until crumbly.
3. Add two tablespoons of water and mix together. Add more water bit-by-bit as needed. 
4. Form the dough into a ball and leave.

To Make (Mince Pies):
1. Preheat the oven to 200 degrees Celsius, and grease the cupcake tray.
2. Roll out half the pastry dough, and cut into circles using the medium-sized cutter (see above).
3. Roll out the other half of the pastry dough and cut into circles using the smaller-sized cutter (see above).
4. Put the medium-sized circles in the tray and fill with mincemeat. 
5. Use the smaller-sized circles as lids and seal round the edge with a small amount of water. 
6. Brush the top of the mince pies with a small amount of milk.
7. Bake for 25-30 minutes and leave to cool. 

The mince pies can either be served hot or cold. To serve hot, simple reheat in the microwave or oven for roughly a minute. 

Saturday, 20 December 2014

BLOGMAS DAY 20- NUTELLA HOT CHOCOLATE

Saturday 20th December 2014
5 sleeps till Christmas 

Nutella hot chocolate is one of those 'I wonder if it's possible' recipes, and it kind of is. I haven't perfected up recipe yet, but I think what I've got is pretty damn good.

You Will Need:
-Mug
-Milk
-Nutella
-Microwave
-Spoon

To Make:
1. Some people may this by heating up the milk in a saucepan first but I really don't think it needs it. I heat my milk in the microwave for about three minutes- partly because I like it burning hot, and party because you need the milk really hot in order for the nutella to dissolve. 
2. Use your spoon to get a massive lump of nutella out of the jar and stir into the milk.
3. It does take a fair amount of time to dissolve the nutella, which is why you need the super hot milk. But it's so worth it in the end. 

Saturday, 13 December 2014

BLOGMAS DAY 13- CHOCOLATE ORANGE MUFFINS

Saturday 13th December 2014
12 sleeps till Christmas

Can you believe that we're already over half way through Blogmas? I'm only just starting beginning to feel properly festive and it's worrying me.

Everyone goes mad for the chocolate and orange combination at Christmas, I mean, what stocking is complete without the Terry's classic? Inspired by my love of Chocolate Oranges and Costa's orange hot chocolate, this simple cupcake recipe is my contribution to the party.

I ended up making muffins instead of cupcakes. This recipe makes roughly 13 muffins.

You Will Need:
-115g butter
-115g caster sugar
-Zest and juice of half an orange

-2 eggs
-115g self-raising flour
-25g-30g dark chocolate
-Festive muffin cases

To Make:
-Preheat the oven to 180 degrees Celcius.
-Grate the half orange for the zest.
-Beat together the butter, sugar and orange zest until light and fluffy.

-Beat in the eggs.
-Juice the half orange.
-Using a grater, grate the dark chocolate.
-Using a metal spoon, fold in the flour, juice of the half orange, and grated chocolate.

-Spoon the mixture into the muffin cases.
-Cook in the oven for 20 minutes.
-Leave to cool.
Nails- Essie 'Bahama Mama'

I am very popular with my family after making these.

Thursday, 4 September 2014

AVERAGE BRITISH BAKE OFF

I am super excited about this recipe as it's one that I've kind of adapted and added my own personal touch to. The lemon mixture for these raspberry and lemon cakes is a Mary Berry lemon cupcakes recipe, but the raspberries are something I have added in a way that will, hopefully, give a creative and different twist to your normal fruity cupcakes.

Makes 20

You Will Need:
-125g soft butter
-125g self-raising flour
-125g caster sugar
-2 tbsp milk
-2 large eggs
-The zest of one lemon
-24 raspberries
-Icing sugar
-Water

To Make:
Apologies if my instructions aren't very clear, especially for the icing. I have put pictures at the bottom to show you what each step should look like.
1. Preheat your oven to 180 degrees Celsius or gas mark 4.
2. Beat the butter, flour, sugar, milk, eggs and lemon zest together with an electric whisk. To zest the lemon simply grate the outside skin of the lemon using a cheese grater.
3. Put your cupcake cases the the tray, here is where my special twist comes in. Put one raspberry upright in the bottom of each cake case and spoon in the mixture around it so the raspberry is completely covered.
4. Cook the cakes for 20-25 minutes or until golden brown. When the cakes are done, leave them to cool.
5. For the icing I am simply following the instructions on the back of the Tate Lyle icing sugar box. HOWEVER, for the way I am wanting to decorate my cakes I only want the tiniest bit of icing so I am making enough icing for 2 cakes instead of 20.
6. To make the icing (for 2 cakes) you simply need to mix one teaspoon of warm water with icing sugar, I don't have a set measurement of icing sugar but just carry on adding until I have the thickness of icing that I want.
7. Put one drop of icing in the centre of each cake and then put one raspberry on top of each. The secret use of the icing is simply to keep the raspberry in place so therefore I think a thicker icing will work better here.

Saturday, 19 April 2014

A CHILDHOOD CLASSIC

It wouldn't be Easter if we didn't have Mini Egg Nests (also hurray for the return of the Mini Egg- the superior chocolate).

You Will Need:
-A cereal of choice (I'm using Cornflakes but I know a lot of people like Rice Krispies or Bran Sticks if you want the authentic nest-look)
-Chocolate (I'm using Dairy Milk- secretly not my favourite don't tell anyone- but any chocolate is good, I recommend milk for this- though dark is my favourite- and you might need quite a lot)
-Mini Eggs (the bigger the packet the better)

You Will Also Need:
-An oven
-A fridge
-A saucepan
-A bowl
-A spoon
-Cupcake cases
-Those small weird fluffy chick things for added Easterness if you so wish
Personally I love the pirate cases

To Make:
-Break up your chocolate into individual pieces and melt over a LOW heat (mine was too hot at first and I ended up burning it).
-Taste the melted chocolate just to make sure it's melted enough or something.
-Pour the cereal into a big mixing bowl and then pour the melted chocolate over the top.
-PLEASE NOTE: there are no measurements for this recipe, you just kind of make however much you want.
-Mix the cereal and chocolate together until you can see no original cereal colour and every last bit of it is covered in chocolate.
-Put into cupcake cases and decorate with Mini Eggs or weird chicks or whatever you want (I used two Mini Eggs on each one because there wasn't room for three).
-Put into the fridge or leave out until they have set/are as hard as you want them to be (I like them to be really hard but my friend likes them to still be warm and runny).
-Eat the remaining Mini Eggs.

Tuesday, 25 March 2014

SKIN THE COLOUR OF MOCHA

Since my school erected (hurhurhur) a coffee bar in the sixth form common room, I have unfortunately become a bit of an addict. My current coffee love is mochas (not to mention how amazing hot chocolate that comes out of a machine is- why is it better than the normal ones?). My love of coffee has led me to experiment at home and I believe I have come up with a sufficient mocha substitute for the time being...

You Will Need:-A mug (duh)
-A teaspoon (double duh)
-Milk (I use semi-skimmed)
-Coffee
-Hot chocolate power stuff
-A Microwave

To Make:
-Fill up your mug with milk
-Microwave it for however long is needed for it to be hot enough to your taste (I do mine for 2mins10secs as my microwave is quite hot and I like my drinks to be burn-your-mouth-boiling hot when I drink them).
-Depending on how chocolatey or coffee-y you want your drink to be, put in the hot chocolate and coffee (coffee is an acquired taste and I prefer my drinks to be slightly more chocolatey so I used one teaspoon of coffee and two teaspoons of hot chocolate).
-Stir and then drink.
-Thank me.

Sunday, 2 February 2014

WHEN LIFE GIVES YOU LEMONS...

So my friend and I decided to try our hand(s) at baking together recently and we were going to try and make macaroons but after that recipe looked impossible we settled for a lemon drizzle cake.

You Will Need:
-3 eggs
-170g self raising flour
-170g caster sugar
-170g unsalted butter
-2 lemons (you will need the zest and the juice of each)
-1 teaspoon backing powder
-110g icing sugar

You Will Also Need:
-A snazzy apron (check out the Beatles magic of mine)
-(Cheese) grater
-Juicer
-A bowl
-Scales
-Electric whisk
-Loaf-shaped tin
-Baking paper
-Skewer/cocktail sticks
This is Bert the cake

How To Make The Cake:
-Preheat the oven to 180 degrees Celsius
-Mix the eggs, flour, sugar, butter, baking powder and zest of two lemons together in a bowl using the electric whisk until it is creamy and batter-like.
-To get the zest of the lemons, simply use the cheese grater to grate the outside skin of the lemons off into your bowl (the outside rind-y bit is the zest).
-Then pour the mixture into the loaf tin and cook for 30-45 minutes (see step one for the temperature).
-Eat the remaining mixture.
-To check that your cake is cooked, stick a knife in the middle of the cake and if the knife comes out clean then it is cooked, if the knife comes out with mixture still on then it is not cooked. Simples.
TAKE NOTE: At first this cake is very, very lemony but it subdues over the day

To Make The Drizzle:
-Add the icing sugar and lemon juice to a bowl and mix using a spoon, the mixture is supposed to look very watery.
-To juice the lemons, you can either cut them in half and use a hand juicer to get the juice out, or you can cut them in half and simply use your hands to squeeze them into the bowl.
-Use a skewer or cocktail sticks to poke some holes all the way through your cake then drizzle the mixture over the top so that it seeps all the way through the cake.

Saturday, 21 December 2013

25 DAYS OF BLOGGING CHRISTMAS- DAY 21 | DECEMBER 21ST- YULE LOG

See I said there would be more cooking posts...
Now we're going to cheat a bit here and buy a premade yule log from Tesco but that's probably a safer idea than me making one myself.


Icing (makes 8, you will probably need two batches):
-2 tablespoons of cocoa powder (we used Cadbury's Bourneville)
-1 tablespoon of butter
-6oz/ 175g of icing sugar
-2 tablespoons of hot water

To make:
-Sift the icing sugar and cocoa powder into a bowl
-Make a well in the icing sugar and cocoa powder and put in the butter and the hot water
-Beat together using a wooden spoon until spreadable
-Using a knife, spread the butter icing on the log, a messier style gives the impression of an actual log but you can also use a fork to make lines down the log
-Leave to set on a flat surface (not the fridge)

To make the base:
-Simply cover a coping board in foil and then dust lightly with icing sugar to give a snowy effect

Monday, 16 December 2013

25 DAYS OF BLOGGING CHRISTMAS- DAY 16- DECEMBER 16TH- DIFFER FROM THE NORM

Now I am a big fan of your normal fruit cake, but there is something I really can't stand about Christmas cake or Christmas pudding. A great way to do Christmas cake that is something everyone will like and is still relatively seasonal is a chocolate orange cake.

When I was having early Christmas dinner with my family friends this weekend, my friend had made the nicest chocolate orange cake. I don't know the full recipe but she says the basics of it is:

-Normal chocolate cake
-But put orange zest in the mix as well
-Normal chocolate sauce icing for on top
-Whip some cream for the icing in the middle
-Decorate with Chocolate Orange segments (yummy)
-Refrigerate up until eaten

This is a really great cake to wow people with as it looks and tastes just like normal chocolate cake but it also has an orangey kick to it as well which tastes amazing. Simple really.

Sunday, 15 December 2013

25 DAYS OF BLOGGING CHRISTMAS- DAY 15 | DECEMBER 15TH- THE ULTIMATE ONE

The one food that you cannot avoid having at Christmas is mince pies. They are the greatest creation ever and the idea of them warm with cream is making me drool on my laptop (mmm sexy). This is hopefully the first of a couple of Christmas cooking things but we will see if I get the time. I am annoyingly hanging over my mother with a camera while she makes these but she makes the best ones, we never eat shop brought ones because they just don't compare with homemade.
Homemade mince pies are great because you can basically customise them, for example with pastry stars on the top instead of the normal disk lids. Plus when people compliment them you can take full credit and it's a great feeling.

Christmas is scarily soon when you come to think of it, only a week on Wednesday...

Friday, 1 November 2013

ROSIE'S WONDERFUL PUMPKIN CUPCAKES

My cakes
My brother's cakes
 
Hello and welcome to the first ever blog post of 'Cooking with Rosie'. In today's post we are going to be exploring the wonderful world of Halloween, starting with 'Rosie's Wonderful Pumpkin Cupcakes' (jk I'm making cupcakes that look like pumpkins and my mother and brother are 'supervising' so that they can play with the icing and make sure I don't burn them like last time- also they want to eat the mixture). Enjoy!

For the cakes (makes 24):
1. Find your trusty recipe book- here is mine, I got it when I was very young and it is actually brilliant for fairy cakes
2. Collect your ingredients
For this recipe you will need:
125g (4oz) of self-raising flour
125g (4oz) of butter
125g (4oz) of caster sugar
1tsp of baking powder
2 eggs
1tsp of vanilla essence
3. Set your oven to 190oC/ 375oF/ Gas mark 5
4. Sieve the flour and baking powder into a bowl
5. Beat the eggs and then add to the bowl along with the butter, sugar and vanilla essence
6. Whisk until creamy and drops off a spoon
7. Fill up 24 cake cases and cook for 20 minutes
8. Eat the remaining mixture
9. When golden, remove the cakes and leave to cool

For the icing (ices 18):
1. Once again, find the new page in your trusty recipe book
2. Collect your ingredients
For this recipe you will need:
7tbsp of icing sugar
3tsp of water
1 drop of food colouring (for this design I will be using a drop of red and a drop of yellow)
Black icing pen (to draw the design onto the cake)
3. Make sure your cakes feel emotionally ready to be iced (we actually left the cakes and iced them the day after so they would be nice and fresh for the Halloween sleepover but also it was easier time wise- e.g. we couldn't be bothered)
4. Stir the water and icing sugar together in a bowl, make sure your icing is thick before you add the food colouring as the food colouring will water it down quite a bit
5. Add the food colouring, add a little if you want a light colour and more if you want it darker
6. Ice your cakes
7. When dry, decorate with the pen, if using something else (e.g. sweets) then decorate when still wet
8. Admire your work while eating the rest of the icing, Instagram it